This guide walks through generating SSH keys in 1Password, configuring your Mac to use the 1Password SSH agent, and adding your public key to remote services.
Prerequisites
- 1Password 8 or later installed on macOS
- Terminal access
- Accounts on services you want to authenticate (GitHub, remote servers, etc.)
Step 1: Generate an SSH Key in 1Password
- Open 1Password
- Click + New Item
- Select for and select SSH Key
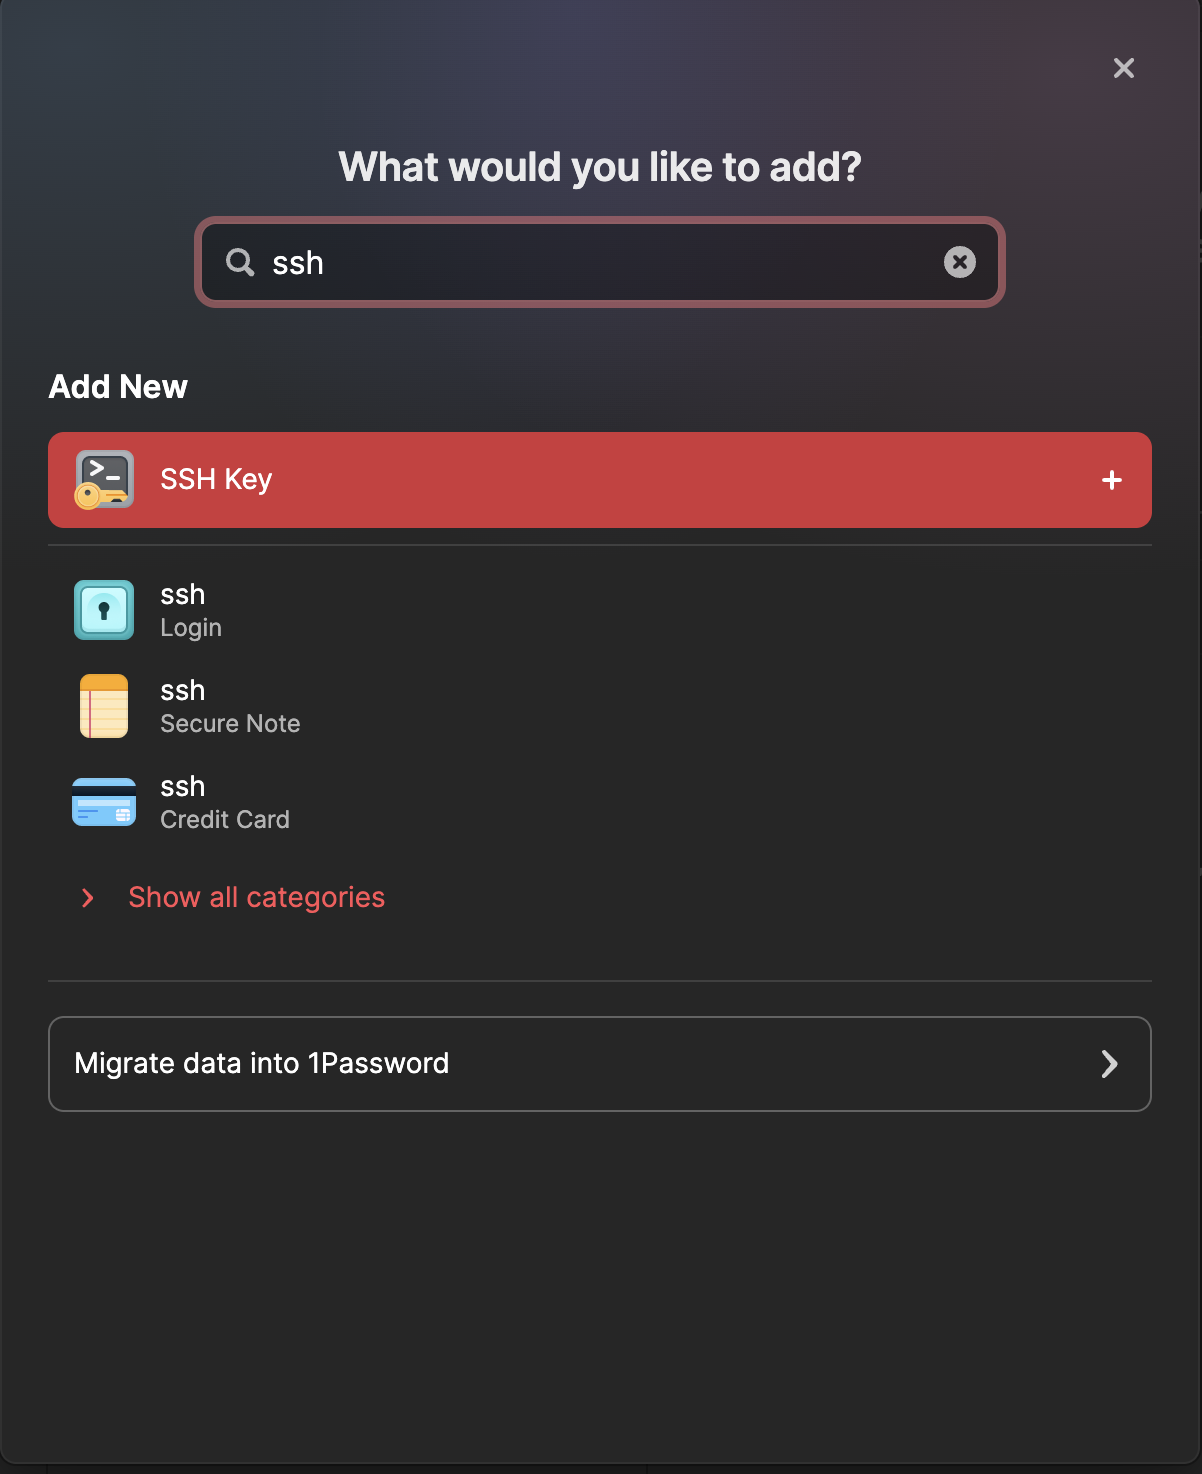
- Name the key descriptively (e.g., “GitHub SSH Key” or “SSH Key”)
- Click Add Private Key

- Select Generate a New Key
- Choose “Ed25519” as the key type and click Generate
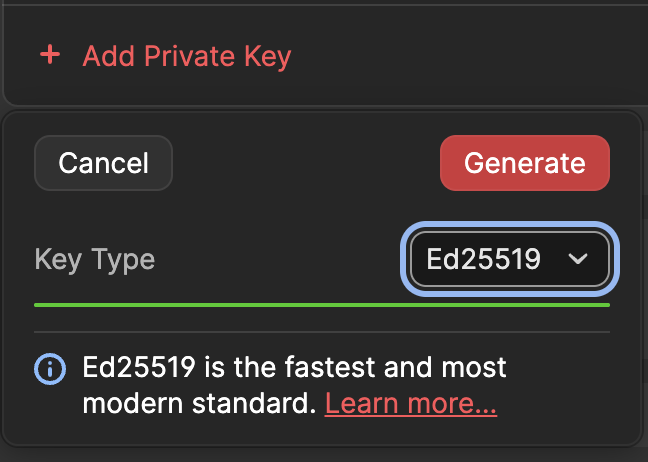
- Click Save
Understanding What 1Password Shows You
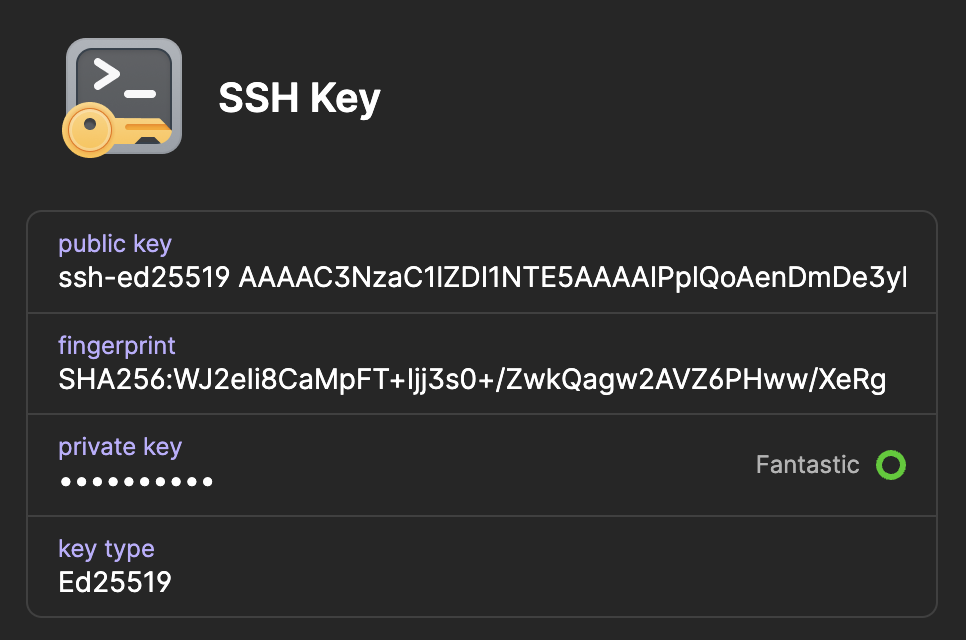
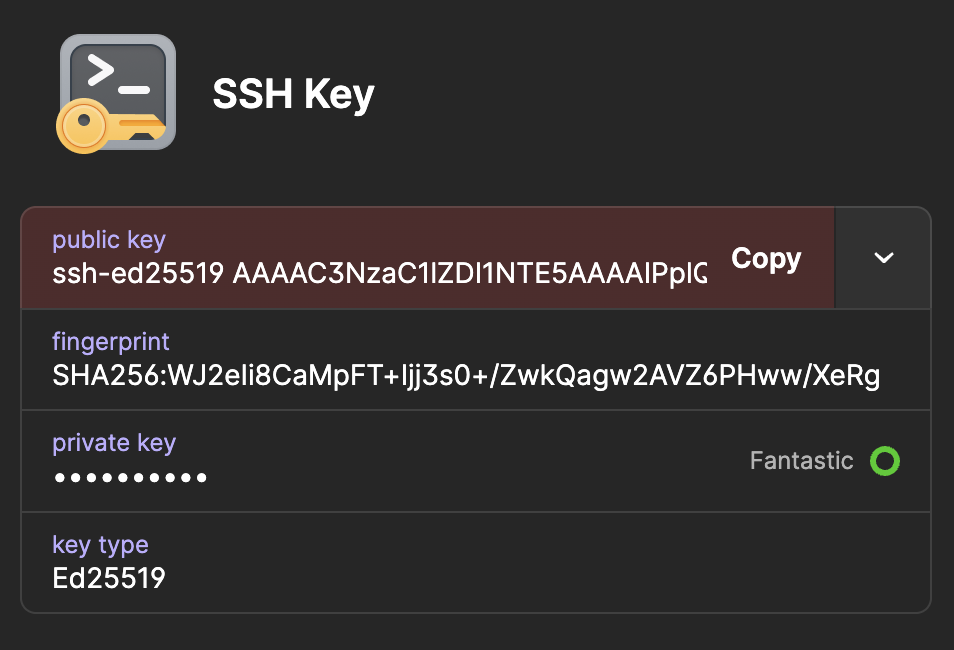
After saving, 1Password displays a summary of your key:
This screen shows the key fingerprint — not the actual public or private key. The fingerprint (e.g., SHA256:/HB/SPJwCw...) is a short hash derived from the public key, used to identify it at a glance. It’s safe to share.
Here’s how the three parts of an SSH key differ:
| Part | What It Is | Safe to Share? |
|---|---|---|
| Private Key | The secret key stored inside 1Password | Never |
| Public Key | The long ssh-ed25519 AAAA... string |
Yes |
| Fingerprint | A short hash of the public key (SHA256) | Yes |
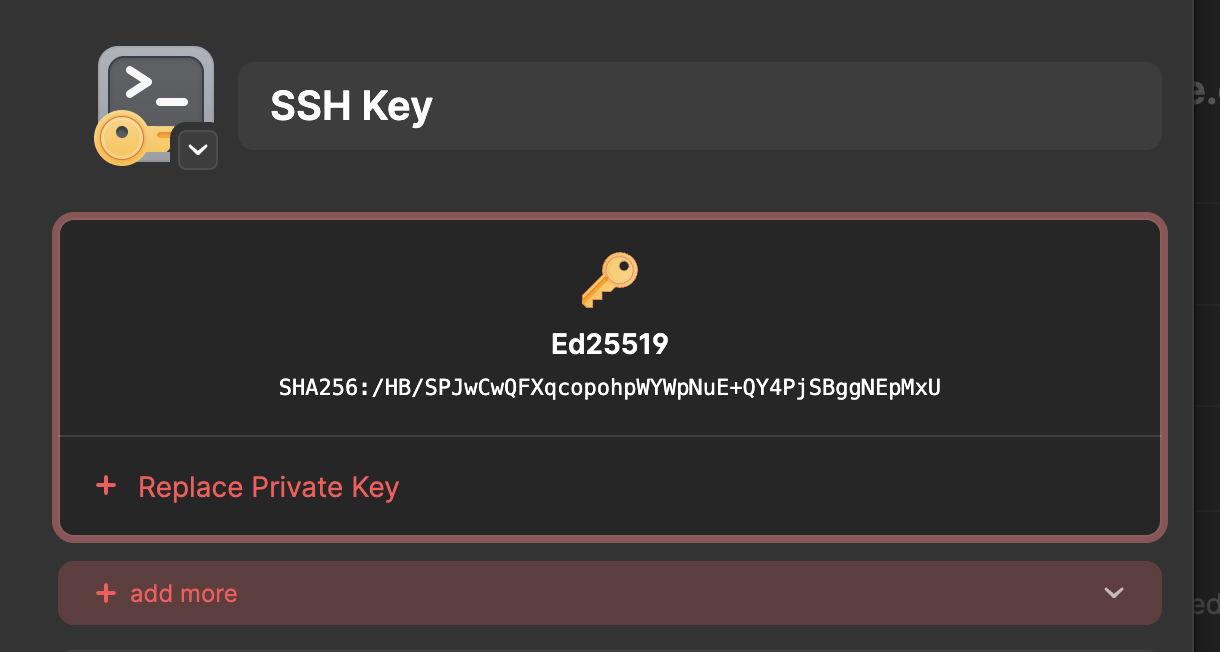
This is what it looks like in the 1Password application window:
The “+ Replace Private Key” button at the bottom of the confirmation window verfies 1Password is securely holding your private key. You’ll never need to export it — the 1Password SSH agent handles authentication without ever exposing the private key to your filesystem.
When you need to add your key to a service like GitHub (Step 4), you’ll copy the public key, not the fingerprint. I cannot stress this enough: NEVER share your private key with anyone or anywhere. Doing so will allow anyone to gain access to your account, and in this case, the computer into which you are SSHing.
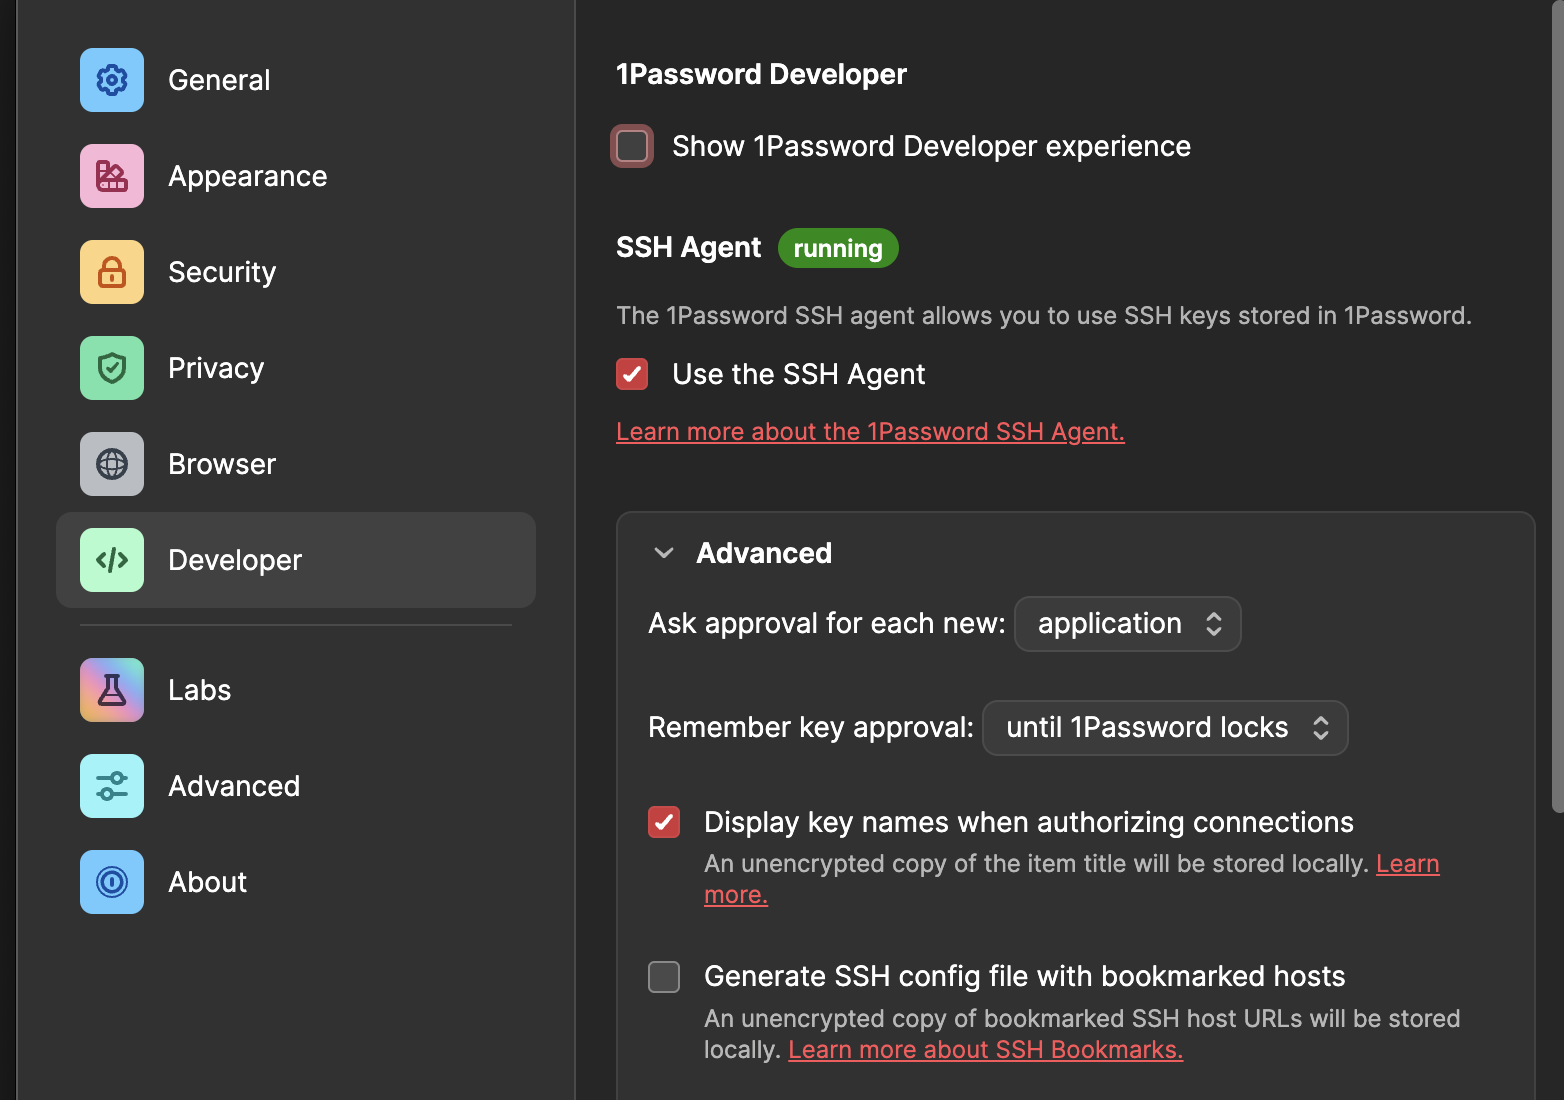
Step 2: Enable the 1Password SSH Agent
- Open 1Password
- Go to Settings (Cmd + ,)
- Click Developer
- Enable Use the SSH Agent
Step 3: Configure SSH to Use 1Password
Create or replace your SSH config file to point to the 1Password agent.
Note: 2BUA8C4S2C.com.1password is AgileBits’ (1Password’s developer) Apple Team ID and bundle identifier. It is a fixed, universal value baked into the app. Every Mac running 1Password 8 uses the same Group Container path for the SSH agent socket.
Backup your SSH config file first:
cp ~/.ssh/config ~/.ssh/config.backup 2>/dev/null
Then:
cat > ~/.ssh/config Host *
IdentityAgent "~/Library/Group Containers/2BUA8C4S2C.com.1password/t/agent.sock"
EOF
Set correct permissions:
chmod 600 ~/.ssh/config
Step 4: Add Your Public Key to Services You Want to Use
GitHub
- In 1Password, open your SSH key item
- Click Copy next to the public key (e.g., from the example above):
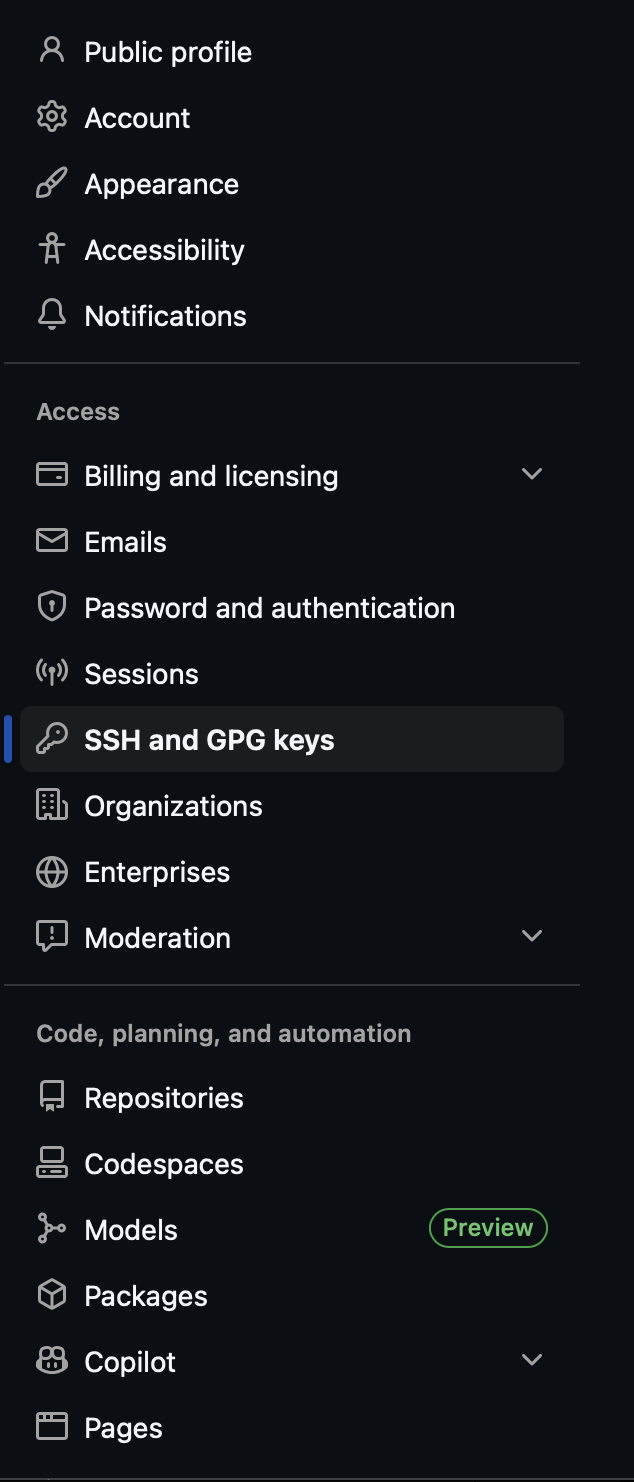
- Go to GitHub → Settings → SSH and GPG keys
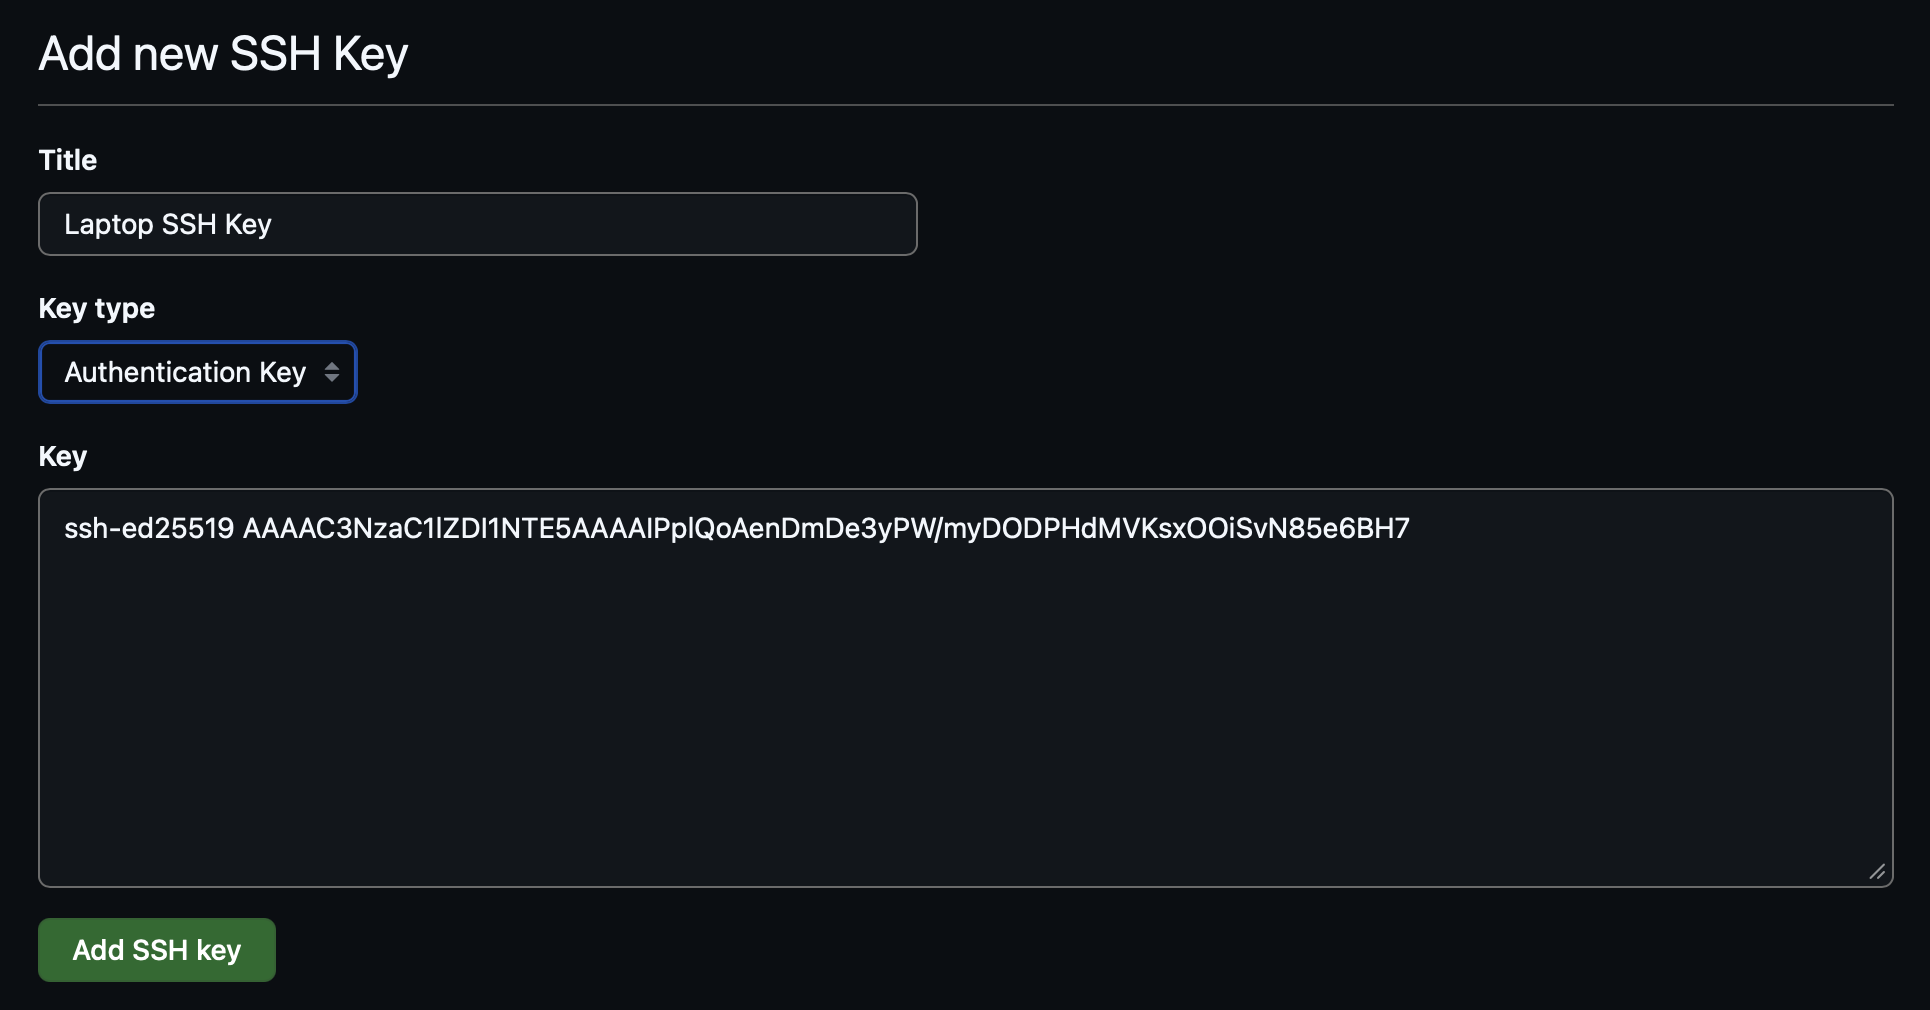
- At the top of the page, click New SSH key

- Add a descriptive title for your new key (e.g., Laptop SSH Key)
- Make sure the Key type is set to Authentication Key
- Paste the public key
- Click Add SSH key
Test the connection in your terminal:
ssh -T git@github.com
1Password will prompt you to authorize. After confirming, you should see:
Hi username! You've successfully authenticated, but GitHub does not provide shell access.
Remote Servers (Linux/macOS)
For each remote server, add your public key to its authorized_keys file.
- Copy your public key from 1Password
- SSH into the server using password authentication:
ssh user@hostname
- Add your public key:
mkdir -p ~/.ssh && chmod 700 ~/.ssh

echo 'your-public-key' >> ~/.ssh/authorized_keys

chmod 600 ~/.ssh/authorized_keys

exit
Replace your-public-key with your actual public key.
- Test passwordless login:
ssh user@hostname
1Password should prompt for authorization instead of asking for a password.
Harden the Server (Recommended)
Now that key-based authentication is working, consider disabling password authentication on the server to prevent brute-force attacks:
sudo sed -i 's/^\#*PasswordAuthentication.*/PasswordAuthentication no/' /etc/ssh/sshd\_config

sudo systemctl restart sshd
sudo sed -i ‘s/^#PasswordAuthentication./PasswordAuthentication no/’ /etc/ssh/sshd_config
sudo systemctl restart sshd
Before doing this, make sure your key-based login is working — otherwise you’ll lock yourself out. It’s a good idea to keep a second terminal session open to the server while testing.
Step 5: Add Host Aliases (Optional)
You can add shortcuts for frequently accessed servers in your SSH config:
cat > ~/.ssh/config > ~/.zshrc
Then reload your shell:
source /.zshrc
Now verify that the 1Password agent is responding:
ssh-add -l
If everything is set up correctly, you’ll see your 1Password keys listed. If you instead see:
The agent has no identities.
Double-check that:
- The 1Password SSH agent is enabled (Step 2)
- You have at least one SSH key saved in 1Password (Step 1)
- 1Password is open and unlocked
Note: If you use Bash instead of Zsh, replace ~/.zshrc with ~/.bashrc in the commands above.
Verify host fingerprints on first connection
The first time you SSH into a new server, you’ll see a prompt like:
The authenticity of host 'hostname (192.168.x.x)' can't be established.
ED25519 key fingerprint is SHA256:xxxxxxxxxxxxxxxxxxx.
Are you sure you want to continue connecting (yes/no/[fingerprint](#))?
Don’t blindly type “yes.” Verify the fingerprint matches your server’s actual host key. You can check it on the server itself by running:
ssh-keygen -lf /etc/ssh/ssh_host_ed25519_key.pub
This protects against man-in-the-middle attacks where someone intercepts your connection and pretends to be the server.
Summary
| Task | Command/Action |
|---|---|
| Test GitHub auth | ssh -T git@github.com |
| List available keys | ssh-add -l |
| View SSH config | cat ~/.ssh/config |
| Connect to host alias | ssh hostname |