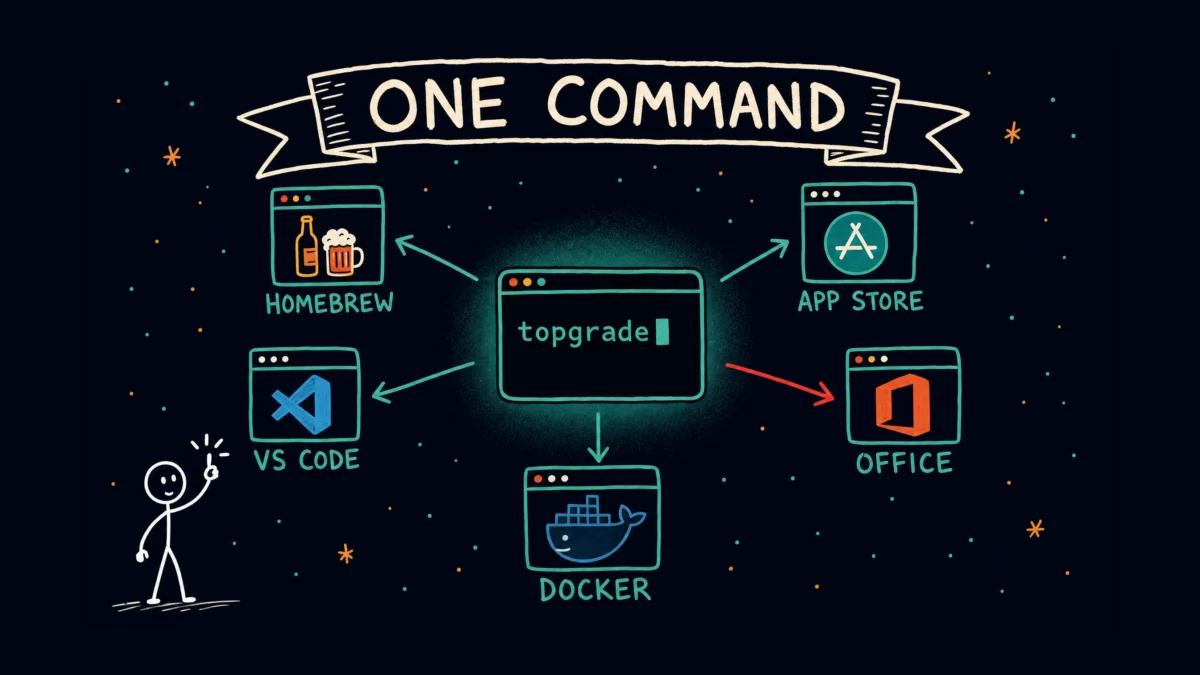
Homebrew has an updater. The App Store has one. Microsoft ships its own. VS Code has another. Topgrade finds all of them and runs them in a single pass. This covers what it touches, how to try it without changing anything, how to switch off the parts you do not want, and how to put it on a schedule so you stop thinking about it.
By the End of This Post You Will Be Able To
- Install topgrade and see every update it would run on your machine without changing a single file
- Read a topgrade run summary and tell which steps succeeded, which failed, and which got skipped
- Switch off any individual update step so topgrade leaves that tool alone
- Update your other machines over SSH inside the same run
- Schedule the whole thing with launchd so it runs without you
This assumes you are on a Mac, you can open Terminal and run a command someone hands you, and you have Homebrew installed. Nothing beyond that.
What You Need Before You Start
A Mac. Topgrade also runs on Linux and Windows, and most of this post applies there too. The examples here are macOS, because macOS is where the update sprawl is worst.
Homebrew. Homebrew is the most common package manager for macOS. A package manager is a program whose job is installing, updating, and removing other programs, so you do not have to hunt down a download page for each one. If you have never installed it, the one-line installer is at brew.sh. Everything else in this post assumes brew works in your terminal.
Ten minutes when you are not in the middle of something. This matters more than it sounds. Topgrade updates a lot of things at once, and the right time to discover that a tool you depend on changed behavior is not twenty minutes before a deadline. More on that at the end.
Why Your Mac Has Several Different Updaters
Software on a Mac comes from a handful of unrelated places, and each one brings its own update mechanism.
The App Store handles anything you installed from Apple’s storefront. It updates through the App Store app, or through a command line tool called mas if you install one.
Homebrew handles two different categories, and it calls them by different names. A formula is a command-line program, like git or ffmpeg. A cask is a regular Mac app with a window and an icon, like Firefox or VS Code. They update with separate commands.
Microsoft ignores all of that. Office updates through a background helper called Microsoft AutoUpdate, which ships a command-line tool named msupdate buried inside /Library/Application Support/Microsoft/.
Sparkle is an open-source update framework that many independent Mac apps embed. It is the thing responsible for the “A new version is available” dialog that appears when you launch an app you have not opened in a month.
macOS itself updates through softwareupdate, which is separate from every one of the above.
Then there are the developer tools, each with its own package manager: npm for Node, cargo for Rust, pipx and uv for Python command-line tools, and gem for Ruby. VS Code manages its extensions separately from VS Code itself. Neovim and Emacs manage their plugins separately from the editor.
None of these know the others exist. Keeping a machine current means visiting six or seven of them and remembering which ones apply to you. In practice, most people do not. They run brew upgrade when they think of it and let the rest drift for months.
What Topgrade Actually Does
Topgrade is not a package manager, and it does not replace any of the tools above. It is a runner. It checks your machine, figures out which update systems are installed, and then runs each one’s update command in sequence. Homebrew still does the Homebrew updating. Topgrade just stops you having to remember that Homebrew is one of eight things you needed to run.
Each thing it can update is called a step. The current version knows roughly two hundred steps, covering macOS system updates, Homebrew formulae and casks, Mac App Store apps, Microsoft Office, Sparkle-based apps, VS Code extensions, every JetBrains IDE, Docker containers, Neovim and Emacs plugins, the Claude Code CLI and its installed plugins, and the long tail of language package managers.
What makes it usable is that detection is automatic and silent. If a tool isn’t installed, topgrade skips that step without comment. You do not configure a list of what you have. You run it, and it handles that. If you install a new tool later, topgrade picks it up on the next run with no action from you.
At the end of a run, it prints a summary table: every step it attempted, and whether that step succeeded or failed. That summary is the actual product. It tells you your machine is current without you having checked seven places.
The project is at github.com/topgrade-rs/topgrade. The -rs matters. The original project was archived by its author, and this is the maintained fork. If you land on the older repo, you are looking at a dead one.
Step 1: Install It
brew install topgrade
That is the whole install on a Mac. Topgrade is a single compiled binary with no runtime to set up, which is why it is available through so many package managers. If you are on Linux, it is in most distribution repositories, and the releases page has prebuilt binaries for everything else.
Confirm it landed:
topgrade --version
Step 2: Do a Dry Run Before You Do Anything Else
Do not run topgrade bare on the first try. Run this instead:
topgrade --dry-run
--dry-run (short form -n) makes topgrade do its entire detection pass and then print the exact command it would run for each step, without running any of them. Nothing on your machine changes. This is the single most useful thing in the tool, because it answers the question you actually have on day one, which is “what is this about to touch?”
Here is real output from that command on my machine, trimmed:
―― macOS system update ――
Dry running: softwareupdate --install --all
―― Brew ――
Dry running: /opt/homebrew/bin/brew update
Dry running: /opt/homebrew/bin/brew upgrade --formula -y
―― Brew - Cask ――
Dry running: /opt/homebrew/bin/brew cu -y
―― macOS App Store ――
Dry running: /opt/homebrew/bin/mas upgrade
―― Microsoft Office ――
Checking for updates... No updates available
―― rustup ――
Dry running: /Users/you/.cargo/bin/rustup update
―― pipx ――
Dry running: /opt/homebrew/bin/pipx upgrade-all --include-injected --quiet
―― Visual Studio Code extensions ――
Dry running: /opt/homebrew/bin/code --update-extensions
―― Git repositories ――
Would pull /Users/you/.dotfiles
―― Claude Code ――
Dry running: /Users/you/.local/bin/claude update
―― uv ――
Dry running: /opt/homebrew/bin/uv self update
What matters here:
- Every line is a command you could have typed yourself. Topgrade is not doing anything clever or hidden. It is running
brew upgradethe same way you would, and the dry run shows you exactly that. Would pull /Users/you/.dotfilesis thegit_reposstep. Topgrade finds git repositories in known locations, and runsgit pullon them. This is the step most likely to surprise you, because it modifies your own project directories rather than installed software. If you have local commits or work in progress in a repo it finds, look at this line carefully.Microsoft Officeran a real check even in dry-run mode. Some steps have to query a server to know whether an update exists, and that query is harmless. Topgrade still does not install anything.- Steps that do not appear at all are the ones you do not have installed. There is no Docker section in my output because Docker is switched off in my config, and no Snap section because Snap is a Linux thing.
Read the whole dry run once. It takes a minute, and it is the only time you need to.
Step 3: Run It for Real
topgrade
Two things will happen that are worth knowing about ahead of time.
It will ask for your password. The macOS system update step runs softwareupdate, which requires administrator rights. Topgrade shells out to sudo, and sudo prompts you. This is normal, and it is the same prompt you would get running that command yourself.
Some steps will ask you to confirm. A few package managers prompt before upgrading. If you want to answer yes to all of them in advance, use -y:
topgrade -y
-y (long form --yes) answers yes to package manager prompts. It optionally takes a list of specific steps, so topgrade -y brew_formula cargo auto-confirms only those two and still asks about everything else.
When it finishes, you get the summary:
―― Summary ――
System update: OK
Brew (ARM): OK
Brew Cask (ARM): OK
App Store: OK
Microsoft Office: OK
rustup: OK
cargo: OK
pipx: OK
Visual Studio Code extensions: OK
npm: OK
Git Repositories: OK
Claude Code: OK
A failing step shows as FAILED rather than OK, and topgrade keeps going rather than stopping. That is the correct behavior for this kind of tool. One broken step should not block the other twenty.
Turning Off the Steps You Do Not Want
The first thing most people want after a dry run is to stop topgrade touching one specific thing. That lives in a configuration file.
Topgrade creates the file on its first run at ~/.config/topgrade.toml. TOML is a plain text configuration format built around key = value lines grouped under [section] headers. You can open it in any editor, or have topgrade open it for you:
topgrade --edit-config
The file ships almost entirely commented out, which means nearly every line starts with # and does nothing. You switch a setting on by deleting the # and editing the value. To turn off individual steps, find the [misc] section and set disable:
[misc]
disable = ["containers", "ollama"]
That is the live setting on my own machine. containers is the Docker step, which pulls fresh images for everything you have, and on a slow connection it dominates the run. ollama updates local language models, which are measured in gigabytes.
What matters here:
disabletakes a list of step names insnake_case, the lowercase-with-underscores style. The names are not always guessable: it isbrew_formulaandbrew_caskas two separate steps,git_reposfor the repository puller,systemfor the macOS updater,microsoft_officefor Office,claude_code_pluginsfor Claude Code’s plugins.- To see the full list of valid names rather than guessing, run
topgrade --helpand read the values listed under--disable. Every step name is printed there. [misc]is a section header. Thedisableline has to come after it to take effect. Dropping the line at the top of the file above any section header is the most common way this silently fails.
Three neighboring settings in the same section are worth knowing:
[misc]
disable = ["containers"]
ignore_failures = ["vim"]
first = ["chezmoi"]
last = ["system"]
ignore_failures lets a step fail without marking the overall run as failed, which is useful for a step you know is flaky. first and last force ordering, so last = ["system"] pushes the macOS update to the end of the run, after everything that does not require a restart.
There is also a command line equivalent if you want to skip something once without editing the file:
topgrade --disable system git_repos
And the inverse, for when you want exactly one thing:
topgrade --only brew_formula brew_cask
Updating Your Other Machines Over SSH
If you run a home server, a Raspberry Pi, or any second machine, topgrade can update those in the same run. SSH is the standard way to get a command line session on another computer over the network, and topgrade drives it directly.
[misc]
remote_topgrades = ["homelab", "pi"]
remote_topgrade_path = ".cargo/bin/topgrade"
ssh_arguments = "-o ConnectTimeout=2"
What matters here:
remote_topgradesis a list of hostnames. These need to be names yoursshcommand already resolves and connects to without a password prompt, which in practice means you have an SSH key set up and an entry in~/.ssh/config. Topgrade does not manage SSH for you. Ifssh homelabdoes not already work in your terminal, this will not either.- Topgrade must already be installed on each remote machine. This is not a push. It connects and runs the remote copy of topgrade, so an unconfigured server does nothing useful here.
remote_topgrade_pathtells it where the binary sits on the remote side, because a non-interactive SSH session often has a narrowerPATHthan your login shell and will not find a binary in~/.local/binor~/.cargo/binon its own. This is the single most common reason remote steps fail with “command not found” when the command plainly exists.- Remote machines are updated first, before your local machine. That ordering is deliberate. If your laptop update requires a restart, the servers are already done.
To run against only some of the configured hosts on a given run:
topgrade --remote-host-limit 'pi'
That flag takes a regular expression matched against the hostnames, not a plain name, so a partial string works as a filter.
Running It on a Schedule
The honest version of this tool is one you never type. On macOS the native scheduler is launchd, which runs jobs described by XML files called property lists, or plists. Cron also still works, but on modern macOS cron needs Full Disk Access granted manually in System Settings before it can touch much of anything, and that trap costs people an afternoon. Use launchd.
There is one problem to solve first. An unattended run cannot answer a sudo password prompt, and the macOS system update step needs one. So a scheduled run should disable that step and leave system updates to you. Write a small wrapper script:
mkdir -p ~/bin
cat > ~/bin/topgrade-scheduled.sh <<'EOF'
#!/bin/zsh
export PATH="/opt/homebrew/bin:$HOME/.local/bin:$HOME/.cargo/bin:$PATH"
/opt/homebrew/bin/topgrade --yes --disable system --no-retry
EOF
chmod +x ~/bin/topgrade-scheduled.sh
What matters here:
- The
export PATHline is the load-bearing one. launchd starts jobs with a minimal environment that does not include Homebrew’s directory, so without this, every single step fails with “command not found” while the same command works perfectly when you type it. This is the number one reason scheduled topgrade runs quietly and does nothing. --disable systemdrops the macOS update step, which is the one that needs a password.--no-retrystops topgrade from asking whether to retry a failed step. There is nobody there to answer.chmod +xmarks the file executable. Without it, launchd will refuse to run it.
Now the plist. Save this as ~/Library/LaunchAgents/com.local.topgrade.plist:
<?xml version="1.0" encoding="UTF-8"?>
<!DOCTYPE plist PUBLIC "-//Apple//DTD PLIST 1.0//EN" "http://www.apple.com/DTDs/PropertyList-1.0.dtd">
<plist version="1.0">
<dict>
    <key>Label</key>
    <string>com.local.topgrade</string>
    <key>ProgramArguments</key>
    <array>
        <string>/Users/you/bin/topgrade-scheduled.sh</string>
    </array>
    <key>StartCalendarInterval</key>
    <dict>
        <key>Weekday</key>
        <integer>2</integer>
        <key>Hour</key>
        <integer>9</integer>
        <key>Minute</key>
        <integer>0</integer>
    </dict>
    <key>StandardOutPath</key>
    <string>/tmp/topgrade.log</string>
    <key>StandardErrorPath</key>
    <string>/tmp/topgrade.err</string>
</dict>
</plist>
What matters here:
Labelhas to be unique across your system and should match the filename. The reverse-domain style is convention, not a requirement.ProgramArgumentsneeds an absolute path.~does not expand here. Replaceyouwith your actual short username, whichwhoamiwill print.StartCalendarIntervalwithWeekday 2means Tuesday. launchd counts Sunday as 0. Omitting a key means “every value”, so leaving outWeekdayentirely would make it run daily at 9:00.StandardOutPathandStandardErrorPathare not optional in practice. A scheduled job has no terminal, so without these the entire run output goes nowhere and a failure is invisible.- If the Mac is asleep at the scheduled time, launchd runs the job when it wakes, rather than skipping it. That is the behavior you want here.
Load it:
launchctl load ~/Library/LaunchAgents/com.local.topgrade.plist
Then test it immediately rather than waiting until Tuesday:
launchctl start com.local.topgrade
cat /tmp/topgrade.log
launchctl start fires the job right now, ignoring the schedule. If the log is empty or full of “command not found”, the PATH line in your wrapper script is wrong.
The Honest Tradeoff
Topgrade updates everything in one pass without asking, and that is both the feature and the cost.
When something breaks after a run, you are not debugging one change. You are debugging twenty simultaneous ones, and the tool that broke may not be the tool that changed. A Homebrew upgrade that bumps a shared library can break an unrelated program that linked against it. The summary table tells you what ran, not what it did.
Three habits make this manageable.
Run it when you have time to do so. Not before a deadline, not on the morning of a demo. The tool’s value is that your machine stays current, and current is only worth something if you have room to deal with the occasional surprise.
Disable the steps that change things you care about deeply. The git_repos step in particular pulls your own repositories. If you would rather control when that happens, turn it off and keep topgrade to installed software.
Keep the scheduled run narrower than the manual one. A weekly unattended job is a good fit for package manager updates and a bad fit for major editor upgrades. --disable exists for exactly this, and there is nothing wrong with a scheduled run that covers half of what your manual run does.
Quick Reference
| Command | What it does |
|---|---|
brew install topgrade |
Install on macOS |
topgrade --dry-run |
Show every command it would run, change nothing |
topgrade |
Run all detected steps |
topgrade -y |
Run and auto-confirm package manager prompts |
topgrade --disable system git_repos |
Skip named steps for this run |
topgrade --only brew_formula brew_cask |
Run only the named steps |
topgrade --edit-config |
Open the config file in your editor |
topgrade --remote-host-limit 'pi' |
Restrict remote runs by regex on hostname |
topgrade --help |
Print every valid step name for --disable and --only |
Config setting (under [misc]) |
What it does |
|---|---|
disable = ["containers"] |
Never run these steps |
only = ["system"] |
Run nothing but these steps |
ignore_failures = ["vim"] |
Let these steps fail without failing the run |
first = ["chezmoi"] / last = ["system"] |
Force ordering |
remote_topgrades = ["pi"] |
Hostnames to update over SSH first |
remote_topgrade_path = ".cargo/bin/topgrade" |
Where the binary lives on remote machines |
assume_yes = true |
Same as passing -y every time |
cleanup = true |
Run each package manager’s cleanup after upgrading |
| File | Purpose |
|---|---|
~/.config/topgrade.toml |
Main config, created on first run |
~/.config/topgrade.d/ |
Extra config files, merged before the main one |
~/Library/LaunchAgents/*.plist |
launchd job definitions for scheduling |
Where This Leaves You
The real change is not the time saved. Running seven update commands by hand takes a few minutes a week. The change is that “is my machine current?” stops being a question you have to hold in your head and becomes a summary table you read.
If you only take one command from this post, take the dry run. topgrade --dry-run is worth typing on any Mac you have used for more than a year, even if you never run the tool for real. It is an inventory of every update system quietly installed on your machine, most of which you forgot you had.
If you like handing chores to the computer, Folder Actions in iCloud moves new files into iCloud Drive with a short AppleScript.