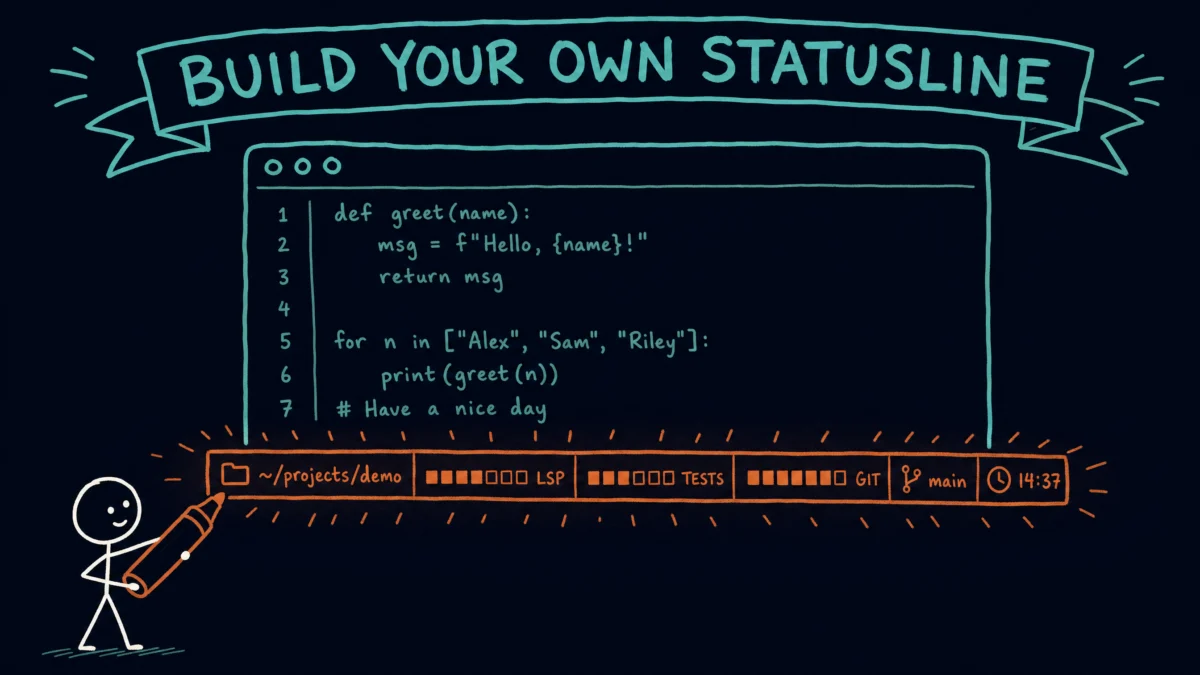
Claude Code shows a tiny info bar at the bottom of your terminal session called a statusline. The default one is fine — but you can replace it with your own script that shows whatever you want. Let’s walk through exactly how to recreate the one I use, even if you’ve never written a shell script in your life.
First Things First: What Is a Statusline?
When you run Claude Code, the bottom line of your terminal window shows a few small bits of information — usually the current model and a couple of other things. That’s the statusline. Think of it like a car dashboard. The road is what you’re focused on, but a quick glance down tells you how fast you’re going, how much fuel you have, and whether anything’s about to go wrong.
The default Claude Code statusline is intentionally minimal. It shows the basics. But Anthropic built in a hook that lets you replace it with any script you want — and that script can show whatever information you find useful.
Here’s what mine looks like right now:
~/code/statusline · ⌥ main +12 -3 · Opus 5 · ctx ███░░░░░ 42% · 5:30pm █░░░░░░░ 18%
Reading left to right, that tells me:
- What folder I’m in —
~/code/statusline - Which git branch I’m on —
⌥ main, with+12 -3meaning I’ve added 12 lines and deleted 3 since the last commit - Which Claude model is active —
Opus 5 - How much of the context window I’ve used —
ctx ███░░░░░ 42%(color-coded, with a little bar) - How close I am to my 5-hour rate limit —
5:30pm █░░░░░░░ 18%(the time is when the limit resets)
If I’ve got subagents running, an agent indicator shows up too. If I’m in a non-default output style, that gets appended at the end.
By the time we’re done, you’ll have all of this running on your machine.
So Why Build Your Own?
Here’s the thing — context awareness is everything when you’re working with Claude Code. If you’re 80% through your context window, you want to know that before you ask Claude to read another huge file. If your 5-hour limit resets at 6 PM, knowing that changes how you plan your work for the next hour.
The default statusline doesn’t tell you any of that. A custom one does. And once you have your own script, you can tweak it any time — adding fields, removing fields, changing colors. It’s yours.
The script I’m going to show you is around 150 lines of bash. Don’t worry if “bash” sounds intimidating — bash is just a programming language for telling your terminal what to do, and we’ll go through everything piece by piece.
What You’ll Need Before We Start
Two things:
- Claude Code, already installed. If you don’t have it yet, Anthropic has a setup guide here — it takes a few minutes.
- A small command-line tool called
jq. This is the only extra dependency.
jq is a program that reads JSON data and pulls out specific pieces of it. JSON is the format Claude Code uses to send information to your statusline script — things like “what model is active” and “how much context has been used.” Without jq, your script would have no way to read that data.
Installing it looks different on each platform, so pick your lane below and skip the other two. Everything after this section is close to identical on all three, and where it isn’t, I’ll say so at the point it matters.
Installing jq on a Mac
Open your Terminal app and run:
brew install jq
brew install jq — Tells Homebrew (a package manager for Mac) to download and install jq. Homebrew is what most Mac developers use to install command-line tools. If you don’t have Homebrew yet, install it first — it takes about a minute.
Skip ahead to Confirming it worked.
Installing jq on Windows
Windows needs two pieces rather than one, and it’s worth knowing why before you install either.
jq itself runs on Windows natively. That part is easy. The catch is that the statusline is a bash script, and bash is the command-line shell that macOS and Linux use. Windows PowerShell cannot run a bash script no matter which JSON tool you have installed, so you need a bash shell too.
The simplest one to get is Git Bash, which comes bundled with Git for Windows. It is a real bash shell plus the small Unix programs this script leans on (awk, sed, grep, find, date), and it installs like any other Windows application. No virtual machine, no Linux, no reboot.
First, install Git for Windows. Download it from git-scm.com/downloads and run the installer. The default options are all fine; you can click through. When it finishes you’ll have a Git Bash entry in your Start menu.
Second, install jq. Open PowerShell (the ordinary one, no Administrator needed) and run:
winget install jqlang.jq
winget install jqlang.jq — winget is the package manager built into Windows 10 and 11, so there is nothing to install in order to use it. jqlang.jq is the official jq package. This puts jq.exe on your system PATH, the list of folders Windows searches when you type a command, which is how Git Bash will find it later.
Now close PowerShell. From this point on, every command in this post goes in the Git Bash window, not PowerShell. Open Git Bash from your Start menu and keep it open.
Already running WSL?
If you already use WSL, the Windows Subsystem for Linux, use it instead. It’s a real Linux system, so follow the Linux instructions everywhere in this post and install jq with
sudo apt install jqin your Ubuntu window. Git Bash is here for people who would rather not add a whole Linux system just for a statusline.
Installing jq on Linux
Open your terminal (GNOME Terminal, Konsole, or whatever your distribution ships) and run the line that matches your package manager. A package manager is the tool your distribution uses to install software, and which one you have depends on which distribution you’re running.
On Debian, Ubuntu, Linux Mint, or Pop!_OS:
sudo apt update && sudo apt install jq
On Fedora, RHEL, Rocky, or AlmaLinux:
sudo dnf install jq
On Arch or Manjaro:
sudo pacman -S jq
sudo means “run this with administrator rights,” so each of these will prompt for your password. On the Debian family, apt update refreshes the catalog of available software first, and the && means “run the first command, and only if it succeeds, run the second.”
Confirming it worked
On any of the three platforms, run this in the same terminal window you just used (Git Bash if you’re on Windows, not PowerShell):
jq --version
If you see something like jq-1.7.1, you’re good. If you see “command not found,” the install didn’t finish properly — try restarting your terminal first, then run the install command again.
That’s the only thing you need to install. Everything else (bash, git, awk, find) already ships with macOS, with Linux, and with Git Bash on Windows.
Where the Script Lives
Claude Code looks for its configuration in a hidden folder called ~/.claude. Let me unpack that filename, because the symbols matter.
The ~ symbol is shorthand for your home folder. On a Mac that’s /Users/yourname. On Linux it’s /home/yourname. In Git Bash on Windows it maps to your ordinary Windows user folder, C:\Users\YourName, which is exactly where Claude Code already keeps its settings. The dot at the start of .claude makes it a hidden folder, which is why it doesn’t show up in Finder, in File Explorer, or in your Linux file manager until you ask to see hidden files. Hidden folders are for things you usually don’t want to touch by accident.
You’re going to put your statusline script at this exact path:
~/.claude/statusline.sh
The .sh extension means “shell script” — it’s a plain text file containing commands the terminal can run.
To make sure the folder exists, run this in your terminal — the Terminal app on a Mac, your usual terminal on Linux, or the Git Bash window on Windows:
mkdir -p ~/.claude
mkdir -p ~/.claude — Creates the .claude folder inside your home directory. The -p flag means “if the folder already exists, don’t complain about it.” This command is safe to run even if the folder is already there.
Step 1: Create the Statusline File
Now you’re going to create the actual script. The simplest way is to use a text editor you already have. One of these works everywhere, and the rest are specific to a platform:
- VS Code, works everywhere — If you have it installed, run
code ~/.claude/statusline.shin your terminal. (VS Code is a free, friendly code editor. If you don’t have it yet, grab it here.) On Windows there’s no extension to add, because with Git Bash the file is an ordinary Windows file. One setting does matter on Windows: look at the bottom-right corner of the VS Code window forCRLForLF, click it, and choose LF before you save. The callout below explains why. nano, Mac and Linux — Runnano ~/.claude/statusline.sh.nanois a small editor that runs inside the terminal window itself, so there’s nothing to install. To save, pressCtrl+O, then Enter. To exit, pressCtrl+X. This is what I’d pick if you just want to get moving. (Git Bash on Windows shipsvimrather thannano, so Windows readers are better off with VS Code or Notepad++.)- TextEdit, Mac only — Run
open -e ~/.claude/statusline.shto open it in TextEdit. Important: Once it opens, go to Format → Make Plain Text if it’s not already in plain text mode. Rich text will break the script. - Notepad++, Windows only — A free plain-text editor from notepad-plus-plus.org. Open the file, then set Edit → EOL Conversion → Unix (LF) before saving.
- gedit or Kate, Linux only — Run
gedit ~/.claude/statusline.shon GNOME, orkate ~/.claude/statusline.shon KDE. Any editor that saves plain text is fine. Avoid a word processor like LibreOffice Writer, for the same reason TextEdit needs plain-text mode.
Windows: watch your line endings
This is the single most common way a Windows install of this script fails. Windows text editors, Notepad above all, end each line with a carriage return and a newline. Bash expects a newline on its own. A script full of stray carriage returns fails with a baffling error along the lines of
bad interpreter: /usr/bin/env bash^M: no such file or directory, where that^Mis the invisible extra character. Set your editor to LF line endings before you save. VS Code has aCRLF/LFbutton in the bottom-right corner, and Notepad++ has Edit → EOL Conversion → Unix (LF). If you’ve already hit the error, run this line in Git Bash to strip the extra characters out of the file you saved:sed -i 's/\r$//' ~/.claude/statusline.sh
Whichever editor you pick, the goal is the same: paste the script below into a new file at ~/.claude/statusline.sh, then save it.
Not on a Mac? Use the other version of the script
The script below is the macOS one, and two lines in it are Mac-specific. It formats the rate-limit reset time with
date -r, which means something entirely different everywhere else, and it looks for subagent files under/private/tmp/, a folder that only exists on macOS. Paste the Mac version anywhere else and your statusline still appears, but the reset time and the subagent counter quietly go missing with no error to tell you why. The GitHub repo has a file calledstatusline-linux.shwith both of those corrected. Linux readers want that file, and so do Windows readers on Git Bash, because Git Bash ships the same GNU versions ofdateand friends that Linux does. Save it as~/.claude/statusline.shand pick up at Step 2. Everything else in this post — the path,chmod,settings.json, the troubleshooting, the modifications — is identical on all three platforms. One honest caveat for Windows: the subagent counter hunts for Claude Code’s scratch files under/tmp/, and I have not confirmed where Claude Code puts those on Windows. If that one segment never appears for you, that’s the likely reason. The rest of the statusline is unaffected.
Here’s the entire Mac script. Copy everything between (and including) the lines:
#!/usr/bin/env bash
# Minimal Claude Code statusline. Renders: cwd · branch · model · ctx%
# Input: Claude Code session JSON on stdin.

set -u

input="$(cat)"

# One-time debug: dump JSON for inspection, then self-disable.
_debug_flag=~/.claude/.statusline-debug
if [[ -f "$_debug_flag" ]]; then
  printf '%s\n' "$input" > ~/.claude/.statusline-input.json
  rm -f "$_debug_flag"
fi

# ANSI helpers
ansi()  { printf '\033[%sm%s\033[0m' "$1" "$2"; }
dim()   { ansi 2 "$1"; }
sep()   { dim ' · '; }

# Threshold color for usage bars. Defaults match the context-window bands
# (green <41, yellow 41-65, red >=66). Pass explicit thresholds for bars
# whose limit auto-resets (e.g. 5h rate limit → 75/90).
threshold_color() {
  local n yellow_at red_at
  n=$(printf '%.0f' "${1:-0}")
  yellow_at="${2:-41}"
  red_at="${3:-66}"
  if   (( n >= red_at ))    ; then printf '31'
  elif (( n >= yellow_at )) ; then printf '33'
  else                             printf '32'
  fi
}

# 8-cell progress bar. Input: 0-100. Output: e.g. "███░░░░░"
bar() {
  local pct="${1:-0}" width=8 filled empty
  filled=$(awk -v p="$pct" -v w="$width" 'BEGIN{ f=p*w/100; printf "%.0f", (f>w?w:(f<0?0:f)) }')
  empty=$(( width - filled ))
  local out=""
  while (( filled-- > 0 )); do out+="█"; done
  while (( empty-- > 0 )); do out+="░"; done
  printf '%s' "$out"
}

# Fields
cwd="$(printf '%s' "$input"       | jq -r '.workspace.current_dir // .cwd // ""')"
model="$(printf '%s' "$input"     | jq -r '.model.display_name // .model.id // ""')"
style="$(printf '%s' "$input"     | jq -r '.output_style.name // ""')"
ctx_pct_raw="$(printf '%s' "$input"   | jq -r '.context_window.used_percentage // empty')"
five_h_pct="$(printf '%s' "$input"    | jq -r '.rate_limits.five_hour.used_percentage // empty')"
five_h_resets="$(printf '%s' "$input" | jq -r '.rate_limits.five_hour.resets_at // empty')"

# Format reset epoch to local "5:30pm" / "9am" (drops :00 on the hour)
fmt_reset_time() {
  local epoch="$1" out
  out=$(date -r "$epoch" '+%-I:%M%p' 2>/dev/null) || return 1
  out="${out//:00/}"
  printf '%s' "$out" | tr '[:upper:]' '[:lower:]'
}
five_h_label="5h"
if [[ -n "${five_h_resets:-}" ]]; then
  t="$(fmt_reset_time "$five_h_resets" 2>/dev/null)" && [[ -n "$t" ]] && five_h_label="$t"
fi

# Active subagents: a*.output symlinks whose target .jsonl was modified
# in the last 60 seconds.
active_agents=""
agent_names=""
agent_cache="$HOME/.claude/.statusline-agents.tsv"

resolve_agent_type() {
  local agent_id="$1" link="$2" hit target session_id proj_slug parent_jsonl agent_type
  if [[ -f "$agent_cache" ]]; then
    hit=$(awk -F'\t' -v id="$agent_id" '$1==id {print $2; exit}' "$agent_cache" 2>/dev/null)
    [[ -n "$hit" ]] && { printf '%s' "$hit"; return; }
  fi
  target="$(readlink "$link" 2>/dev/null)"
  [[ -z "$target" || ! -f "$target" ]] && return
  session_id="$(basename "$(dirname "$(dirname "$target")")")"
  proj_slug="$(basename "$(dirname "$(dirname "$(dirname "$target")")")")"
  parent_jsonl="$HOME/.claude/projects/$proj_slug/$session_id.jsonl"
  [[ -f "$parent_jsonl" ]] || return
  agent_type="$(grep -F "\"agentId\":\"$agent_id\"" "$parent_jsonl" \
                | head -1 \
                | jq -r '.toolUseResult.agentType // empty' 2>/dev/null)"
  [[ -z "$agent_type" ]] && return
  printf '%s\t%s\n' "$agent_id" "$agent_type" >> "$agent_cache"
  printf '%s' "$agent_type"
}

if [[ -n "${cwd:-}" ]]; then
  slug="$(printf '%s' "$cwd" | sed 's|[/. ~]|-|g')"
  sess_root="/private/tmp/claude-$(id -u)/$slug"
  if [[ -d "$sess_root" ]]; then
    latest_session="$(/bin/ls -t "$sess_root" 2>/dev/null | head -1)"
    tasks_dir="$sess_root/$latest_session/tasks"
    if [[ -d "$tasks_dir" ]]; then
      types_collected=""
      while IFS= read -r link_path; do
        [[ -z "$link_path" ]] && continue
        orig_link="$tasks_dir/$(basename "$link_path")"
        aid="$(basename "$orig_link" .output)"
        t="$(resolve_agent_type "$aid" "$orig_link")"
        [[ -z "$t" ]] && t="?"
        types_collected+="$t"$'\n'
      done < <(find -L "$tasks_dir" -maxdepth 1 -name 'a*.output' \
               -newermt '60 seconds ago' -type f 2>/dev/null)
      active_agents=$(printf '%s' "$types_collected" | grep -c . || true)
      if [[ "${active_agents:-0}" -gt 0 ]]; then
        agent_names=$(printf '%s' "$types_collected" | sort | uniq -c | awk '
          { count=$1; $1=""; sub(/^ +/, ""); type=$0;
            sep=(NR==1 ? "" : ", ");
            if (count > 1) printf "%s%s×%d", sep, type, count;
            else           printf "%s%s",     sep, type
          }')
      else
        active_agents=""
      fi
    fi
  fi
fi

# Display cwd: full tilde-collapsed path. Canonicalize iCloud Obsidian
# vault to ~/Obsidian (same data, two filesystem views).
display_cwd="$cwd"
icloud_obsidian="$HOME/Library/Mobile Documents/iCloud~md~obsidian/Documents"
if [[ "$display_cwd" == "$icloud_obsidian"* ]]; then
  display_cwd="$HOME/Obsidian${display_cwd#$icloud_obsidian}"
fi
display_cwd="${display_cwd/#$HOME/~}"

# Git: branch + diff stats. The +/- counts already imply dirty, so no `*` marker.
branch=""
git_adds=""
git_dels=""
if [[ -n "${cwd:-}" ]] && git -C "$cwd" rev-parse --is-inside-work-tree >/dev/null 2>&1; then
  branch="$(git -C "$cwd" symbolic-ref --short HEAD 2>/dev/null \
            || git -C "$cwd" rev-parse --short HEAD 2>/dev/null)"
  _shortstat="$(git -C "$cwd" diff --shortstat HEAD 2>/dev/null)"
  if [[ -n "$_shortstat" ]]; then
    _adds="$(printf '%s' "$_shortstat" | grep -oE '[0-9]+ insertion' | grep -oE '[0-9]+')"
    _dels="$(printf '%s' "$_shortstat" | grep -oE '[0-9]+ deletion'  | grep -oE '[0-9]+')"
    [[ -n "$_adds" ]] && git_adds="$_adds"
    [[ -n "$_dels" ]] && git_dels="$_dels"
  fi
fi

# Context %
ctx_pct=""
if [[ -n "${ctx_pct_raw:-}" ]]; then
  ctx_pct="$(printf '%.0f%%' "$ctx_pct_raw" 2>/dev/null)"
fi

# Compose
out=""
[[ -n "$display_cwd" ]] && out="$display_cwd"
if [[ -n "$branch" ]]; then
  out+="$(sep)⌥ $branch"
  [[ -n "$git_adds" ]] && out+=" $(printf '\033[32m+%s\033[0m' "$git_adds")"
  [[ -n "$git_dels" ]] && out+=" $(printf '\033[31m-%s\033[0m' "$git_dels")"
fi
if [[ -n "$model" ]]; then
  out+="$(sep)$(dim "$model")"
fi
if [[ -n "${ctx_pct_raw:-}" ]]; then
  c="$(threshold_color "$ctx_pct_raw")"
  out+="$(sep)$(dim "ctx ")$(ansi "$c" "$(bar "$ctx_pct_raw") $ctx_pct")"
fi
if [[ -n "${five_h_pct:-}" ]]; then
  c="$(threshold_color "$five_h_pct" 75 90)"
  out+="$(sep)$(dim "$five_h_label ")$(ansi "$c" "$(bar "$five_h_pct") $(printf '%.0f' "$five_h_pct")%")"
fi
if [[ -n "${active_agents:-}" ]]; then
  out+="$(sep)$(ansi 36 "◆ $active_agents")"
  [[ -n "$agent_names" ]] && out+="$(dim " $agent_names")"
fi
if [[ -n "$style" && "$style" != "default" ]]; then
  out+="$(sep)$(dim "$style")"
fi

printf '%s' "$out"
Save the file. That’s the whole script.
If that wall of code felt overwhelming, that’s normal. You don’t need to understand every line to use it — you just need to put it in the right place and tell Claude Code to use it. We’ll cover what each part actually does in the deep-dive section later.
Step 2: Make the Script Executable
A script in a file is just text. To actually run it, your computer needs permission. By default, files you create are not “executable,” meaning the operating system won’t try to run them as programs. You have to explicitly mark them as runnable.
Same command on all three platforms. Run it in Terminal on a Mac, your usual terminal on Linux, or the Git Bash window on Windows:
chmod +x ~/.claude/statusline.sh
chmod +x ~/.claude/statusline.sh — chmod is short for “change mode,” and +x means “add the execute permission.” Together, this tells your operating system: “It’s okay to run this file as a program.” You only have to do it once per file, not every time you edit it.
Two small platform notes. On Linux, the permission won’t stick if the script sits on a Windows-formatted drive such as an NTFS or FAT USB stick, because those formats have nowhere to record it. Keep the script in your home folder and it never comes up. On Windows, there is no Unix execute permission at all, so Git Bash approximates one. The command runs without complaint but may change nothing real underneath, and that’s fine, because on Windows it’s bash itself that runs your script, called from settings.json in the next step, and bash reads a script rather than executing it directly. Run the command anyway, so it’s one fewer thing to suspect if something goes wrong later.
To confirm it worked, run:
ls -l ~/.claude/statusline.sh
ls -l ~/.claude/statusline.sh — Lists that one file along with its details. Look at the cluster of letters at the very start of the line. You want x characters in there, as in -rwxr-xr-x. Each x means “executable.” If you see -rw-r--r-- instead, with no x anywhere, the chmod didn’t take, so run it again and check the path is spelled exactly right. Git Bash reports -rwxr-xr-x for nearly everything in your user folder regardless, so on Windows this check tells you less than it does elsewhere.
Step 3: Wire the Script Into Claude Code
Right now your script exists, but Claude Code doesn’t know about it. You tell Claude Code to use it by editing the settings file at ~/.claude/settings.json.
JSON is a format for storing structured data. Think of it like a labeled box: every piece of information has a name and a value, and you can have boxes inside boxes.
Open the settings file:
code ~/.claude/settings.json
(Or use nano, or any of the other editors from Step 1 — same options, same platforms.)
If the file doesn’t exist yet, your editor will create it as a blank file. If it already exists, you’ll see whatever Claude Code settings you’ve configured before.
You’re going to add (or update) one section. If the file is empty, paste this entire block:
{
  "statusLine": {
    "type": "command",
    "command": "~/.claude/statusline.sh"
  }
}
If the file already has content, you only need to add the statusLine part — making sure to put a comma after whichever setting comes before it. For example, if you already had a permissions block, the result would look like:
{
  "permissions": {
    ...
  },
  "statusLine": {
    "type": "command",
    "command": "~/.claude/statusline.sh"
  }
}
What this does, piece by piece:
"statusLine"— The name of the setting Claude Code looks for to find your statusline."type": "command"— Tells Claude Code “this is a shell command, not a built-in option.” Other types might exist in the future, but"command"is what you want."command": "~/.claude/statusline.sh"— The actual path to the script Claude Code should run. The~gets expanded to your home folder automatically.
Save the file.
Windows: you may need to name bash in the command
On macOS and Linux, Claude Code can run the script directly, because the
#!/usr/bin/env bashline at the top of the file tells the system what to run it with. Windows has no equivalent convention, so it may not know thatstatusline.shis meant for bash. Try the plain version above first. If your statusline stays blank and the troubleshooting steps below all check out, change thecommandline to name Git Bash explicitly:"command": "C:\\Program Files\\Git\\bin\\bash.exe -c '~/.claude/statusline.sh'"The doubled backslashes are required: JSON treats a single backslash as the start of an escape code, so every literal backslash in a Windows path has to be written twice. Adjust the path if you installed Git somewhere other than the default location.
Step 4: Restart Claude Code and Check
Claude Code reads settings.json when it starts, so any changes you just made won’t take effect until you restart it.
Step 1: Close any open Claude Code sessions (type exit or press Ctrl+C twice).
Step 2: Start a fresh session by running:
claude
Step 3: Look at the bottom of the terminal. You should now see your custom statusline.
If it shows up looking like the example at the top of this post — you’re done. Congratulations. You just installed your first Claude Code customization.
What If It’s Not Showing Up?
A blank statusline almost always means one of three things. Let’s go through them in order.
Check 1: Is the script actually running?
Run the script manually with some fake input to see if it produces output:
echo '{"workspace":{"current_dir":"/tmp"},"model":{"display_name":"Test"},"context_window":{"used_percentage":50}}' | ~/.claude/statusline.sh
You should see something like /tmp · Test · ctx ████░░░░ 50% printed back to you.
Run it in whichever shell you’ve been using: Terminal on a Mac, your terminal on Linux, Git Bash on Windows.
If you see an error like “command not found,” the file isn’t where Claude Code expects it — double-check the path. If you see “permission denied,” you forgot Step 2 (chmod +x). On Windows, if neither of those fits and nothing prints at all, try putting bash in front of the script path, as in ... | bash ~/.claude/statusline.sh. If that version works and the plain one doesn’t, that’s your signal to use the bash.exe form of the command line back in Step 3. If you see “jq: command not found,” jq didn’t install properly — re-run the install command for your platform (brew install jq on a Mac, winget install jqlang.jq on Windows, sudo apt install jq on Debian or Ubuntu, sudo dnf install jq on Fedora, sudo pacman -S jq on Arch). On Windows, close and reopen Git Bash afterward so it picks up the updated PATH.
Check 2: Is settings.json valid JSON?
JSON is picky. A missing comma or a mismatched bracket and Claude Code will silently fail to load your statusline. Run this to check:
jq . ~/.claude/settings.json
jq . ~/.claude/settings.json — Asks jq to read the settings file and print it back nicely formatted. If it prints your settings, the JSON is valid. If it shows an error message pointing to a line number, that’s where the problem is.
The most common JSON mistakes are:
- A comma after the last item in a block (JSON doesn’t allow trailing commas)
- A missing comma between items
- A missing closing
}at the end
Check 3: Use the built-in debug trick
This is my favorite part. The script has a one-shot debug mode built in. Run this:
touch ~/.claude/.statusline-debug
touch ~/.claude/.statusline-debug — Creates an empty file at that path (or updates its timestamp if it exists). The script checks for this exact file. When it finds it, it dumps everything Claude Code sent it into a JSON file you can inspect, then deletes the trigger so it only runs once.
After you create that file, send any message in your Claude Code session — anything that triggers the statusline to render. Then run:
jq . ~/.claude/.statusline-input.json
This shows you the exact JSON Claude Code is sending to your script. If a field you expected (like context_window) is missing, that’s the clue you need.
Understanding What the Script Actually Does
You’ve got a working statusline now. But you might be curious about how it actually works. Let me walk through the most interesting parts.
The Color-Coded Progress Bars
The bars next to ctx and 5h change color based on how full they are. But here’s the interesting part — they don’t use the same thresholds. The two bars mean different things, so they need different warning bands.
Why the difference? The context window is a hard ceiling. Once you fill it, you have to run /compact or /clear — there’s no way around it. So you want to know early. The 5-hour rate limit is different — it auto-resets when the window closes, so you don’t need to do anything. It’s just useful to know how close you are.
That logic lives in this function:
threshold_color() {
  local n yellow_at red_at
  n=$(printf '%.0f' "${1:-0}")
  yellow_at="${2:-41}"
  red_at="${3:-66}"
  if   (( n >= red_at ))    ; then printf '31'   # red
  elif (( n >= yellow_at )) ; then printf '33'   # yellow
  else                             printf '32'   # green
  fi
}
What this does, line by line:
n=$(printf '%.0f' "${1:-0}")— Takes the percentage that was passed in ($1), rounds it to a whole number. The:-0part means “if nothing was passed, use 0.”yellow_at="${2:-41}"— Takes the second argument as the yellow threshold, but defaults to 41 if no second argument is passed. That’s the:-41part.red_at="${3:-66}"— Same idea — third argument is the red threshold, defaults to 66.if (( n >= red_at ))— If the value is at or above the red threshold, output31(the ANSI code for red).elif (( n >= yellow_at ))— Otherwise, if it’s at or above the yellow threshold, output33for yellow.else— Anything below the yellow threshold gets32for green.
The ctx bar uses the defaults, so it’s called like threshold_color "$ctx_pct_raw" — green below 41, yellow 41–65, red 66 and up.
The 5h bar overrides them: threshold_color "$five_h_pct" 75 90 — green below 75, yellow 75–89, red 90 and up. More relaxed, because hitting the limit isn’t a wall — it just means you wait it out.
You can tweak any of these numbers. Want the ctx bar to go red at 80% instead of 66%? Find the line red_at="${3:-66}" and change 66 to 80. Want the 5h bar to be stricter? Change the call site from 75 90 to 60 80.
The 8-Cell Progress Bar
The little block-and-empty-square bar (███░░░░░) is built like this:
bar() {
  local pct="${1:-0}" width=8 filled empty
  filled=$(awk -v p="$pct" -v w="$width" 'BEGIN{ f=p*w/100; printf "%.0f", (f>w?w:(f<0?0:f)) }')
  empty=$(( width - filled ))
  local out=""
  while (( filled-- > 0 )); do out+="█"; done
  while (( empty-- > 0 )); do out+="░"; done
  printf '%s' "$out"
}
What this does, piece by piece:
width=8— The total number of cells in the bar. Change this to make the bar wider or narrower.filled=$(awk ...)— Usesawk(a small calculator program) to figure out how many cells should be filled, based on the percentage. At 50%, that’s 4 cells. At 75%, that’s 6.while (( filled-- > 0 )); do out+="█"; done— Adds a filled block character (█) for each filled cell.while (( empty-- > 0 )); do out+="░"; done— Adds a hollow block character (░) for each empty cell.
That’s how 40% becomes ███░░░░░. The bar visualizes what the percentage means at a glance.
The Subagent Counter
When Claude Code spawns subagents (separate Claude instances doing background work), they each leave a small trail in a temporary folder. The script looks for those trails:
sess_root="/private/tmp/claude-$(id -u)/$slug"
$(id -u) is your user ID number. $slug is your current folder, with slashes and dots replaced by dashes. Together, they form the path where Claude Code stashes per-session data.
That /private/tmp/ prefix is one of the two Mac-specific bits I flagged back in Step 1. On Linux, and under Git Bash on Windows, the same folder is plain /tmp/, so the non-Mac version of the script uses that instead. It’s a one-word difference, but on the wrong platform the folder simply never exists and the agent indicator never appears.
The script then looks at any agent files modified in the last 60 seconds — that’s how it knows which agents are currently running versus ones that finished hours ago. Old ones get ignored. If you send routine jobs to cheaper sub-agents with jev-router, this is where they show up.
If this section feels deep — that’s because it is. You don’t need to understand it to use the statusline. I’m just showing you so you can see that everything in the script has a reason for being there.
What’s Actually Different Off macOS
I used macOS for the pasted script because that’s what most readers are on, and I pointed Linux and Windows readers at statusline-linux.sh back in Step 1. Here’s what’s actually different in that file, so it isn’t a black box. Both differences come down to the same thing: macOS inherits its command-line tools from BSD Unix, while Linux and Git Bash use the GNU versions, and the two disagree on some details.
date takes different flags. To turn a Unix timestamp into a readable clock time, macOS wants date -r 1735689600, while Linux wants date -d @1735689600. On Linux, -r means “show me the modification time of this file,” so the Mac version doesn’t error out. It just quietly returns nothing, and the statusline falls back to the plain label 5h instead of showing you the reset time.
The temporary folder is somewhere else. macOS puts per-session scratch data under /private/tmp/. Linux uses /tmp/. That’s where the script hunts for running subagents, so on the wrong path the agent indicator never shows up.
The Linux file adds one feature. It adapts to your terminal width, dropping segments when the window is narrow. That’s useful if you ever SSH into a server from your phone or an iPad.
Grab it from the GitHub repo, save it to ~/.claude/statusline.sh, and the install steps are otherwise identical. Windows readers on Git Bash want this file too, since Git Bash bundles the same GNU tools Linux uses.
How to Modify the Statusline
Since the script is just a bash file, you can change anything you want. A few easy starter changes:
- Show only what you want. Find the
# Composesection near the bottom — eachifblock adds one segment. Comment out (with#) any segment you don’t care about. - Change the separator. The
sep()function defines what goes between segments (right now it’s a dim·). Change' · 'to anything else —' | ',' → ', whatever you like. - Change the order. Move the
ifblocks in the Compose section around to put your favorite info first.
If you’d rather not edit bash by hand, just ask Claude Code to do it for you. Open a session in any folder, point Claude at ~/.claude/statusline.sh, and tell it what you want — “show the current time,” “remove the 5-hour bar,” “make the branch name appear first.” Claude can edit the script directly. Not sure what to add? The /insights command shows how you actually use Claude Code, which makes it easier to pick the numbers worth keeping on screen.
Quick Reference: Everything Mentioned in This Guide
| Thing | What It Does |
|---|---|
~/.claude/statusline.sh |
The bash script Claude Code runs to render your statusline |
~/.claude/settings.json |
The settings file that tells Claude Code which statusline command to use |
~/.claude/.statusline-debug |
A trigger file — create it to dump the next session’s JSON for inspection |
~/.claude/.statusline-input.json |
Where the debug dump gets written |
jq |
A command-line tool for reading JSON. Install with brew install jq (Mac), winget install jqlang.jq (Windows), sudo apt install jq (Debian/Ubuntu), sudo dnf install jq (Fedora), or sudo pacman -S jq (Arch). |
statusline-linux.sh |
The non-Mac version of the script, in the GitHub repo. Use it on Linux and on Windows. Fixes the date flags and the /tmp/ path. |
| Git Bash | Windows only. The bash shell that runs the script. Comes with Git for Windows. |
| LF line endings | Windows only. Set your editor to LF, not CRLF, or bash rejects the script. |
chmod +x file |
Marks a file as executable so the operating system can run it |
mkdir -p ~/.claude |
Creates the .claude folder (does nothing if it already exists) |
If any of this felt overwhelming, that’s normal. There’s a lot going on in 150 lines of bash, and you don’t need to understand every piece to benefit from it. Start with just the install — get the script in place, wire it up, see it appear on your screen. Once that’s working, you can tweak one small thing — maybe change a color threshold, or remove a segment you don’t use. That’s how everyone learns this stuff. One piece at a time.